Textual – The New MaskedInput Widget

Textual v0.80.0 was released today, and it included the brand-new MaskedInput widget. If you have used other GUI toolkits, such as wxPython, you might already be familiar with a masked input widget. These widgets allow you to control the user’s input based on a mask string that the developer provides when instantiating the widget.
Let’s spend a few brief moments learning how this new widget works.
Getting the Latest Textual
Before you can use the MaskedInput widget, you must ensure you have version 0.80.0 or greater. If you have an older version, then you’ll need to upgrade by running the following command in your terminal:
python -m pip install textual --upgrade
Now that you have a 0.80.0 or greater, you can use this great widget!
Using the MaskedInput Widget
The Textual documentation has a credit card masked string for their demo application. Let’s start by looking at that example:
from textual.app import App, ComposeResult
from textual.widgets import Label, MaskedInput


class MaskedInputApp(App):
    # (1)!
    CSS = """
    MaskedInput.-valid {
        border: tall $success 60%;
    }
    MaskedInput.-valid:focus {
        border: tall $success;
    }
    MaskedInput {
        margin: 1 1;
    }
    Label {
        margin: 1 2;
    }
    """

    def compose(self) -> ComposeResult:
        yield Label("Enter a valid credit card number.")
        yield MaskedInput(
            template="9999-9999-9999-9999;0",  # (2)!
        )


if __name__ == "__main__":
    app = MaskedInputApp()
    app.run()
The template in this code says that you want four groups of four digits. The template automatically adds a dash after each four digits except the last one.
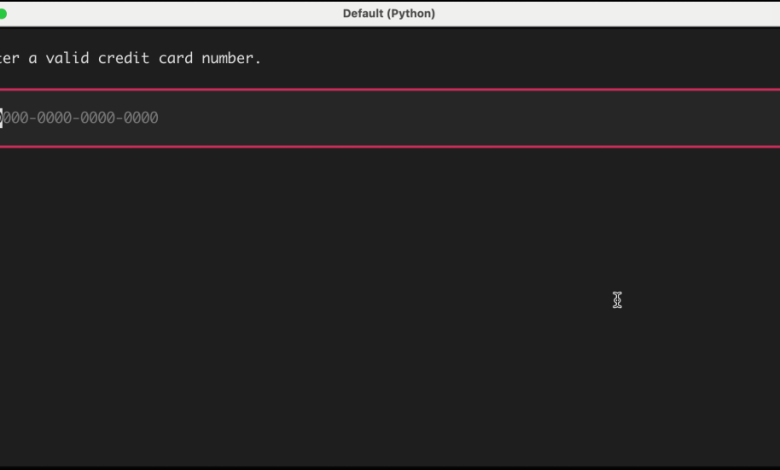
When you run this code, you will see something like this:
Note that when the widget is empty or not completely filled out, there is a red outline around it. The widget will ignore all keys except for number keys. So if you press A-Z or any special characters like semi-colon or question mark, the MasketInput widget will ignore them and nothing appears in the widget.
When you have entered four groups of four integers though, you will see the red outline turn green. Here’s an example:

Note that this code does NOT actually validate that these are working credit card numbers. It only validates that there four groups of four integers.
A more common mask would be to create something to accept phone numbers. Let’s take the code above and rewrite the mask and the label text accordingly:
from textual.app import App, ComposeResult
from textual.widgets import Label, MaskedInput


class MaskedInputApp(App):
    # (1)!
    CSS = """
    MaskedInput.-valid {
        border: tall $success 60%;
    }
    MaskedInput.-valid:focus {
        border: tall $success;
    }
    MaskedInput {
        margin: 1 1;
    }
    Label {
        margin: 1 2;
    }
    """

    def compose(self) -> ComposeResult:
        yield Label("Enter a valid phone number.")
        yield MaskedInput(
            template="(999)-999-9999;0",
        )


if __name__ == "__main__":
    app = MaskedInputApp()
    app.run()
If you runt his code, the output it a little different, but the concept is the same:

The MaskedInput widget is using regular expressions to mask characters. If you look at the documentation you can see how it works. Following are a few examples from the documentation:
A |
[A-Za-z] |
Yes |
a |
[A-Za-z] |
No |
N |
[A-Za-z0-9] |
Yes |
n |
[A-Za-z0-9] |
No |
X |
[^ ] |
Yes |
x |
[^ ] |
No |
9 |
[0-9] |
Yes |
This widget may get additional updates to include more refined regular expressions, so it is definitely best to review the documentation for the latest information on the masked templates and how they work.
Wrapping Up
The MaskedInput widget is a great addition to the Textual TUI toolkit. There are lots of great widgets included with Textual now. While there may not be as many as wxPython or PyQt, those projects have been around for a couple of decades and have had much more time to mature. You can create really amazing and neat applications in your terminal with Python and Textual. You should try it out today!


